Guide to restrict domains for Nostr signer extensions
Note: To learn about creating and managing Nostr keys and setting up Nostr signer extensions on your browsers read this guide.
Restricting domains on Nost signer extensions
Currently Nostr Signer extensions like Nos2x, Nos2x-fox and Alby ask more permissions by default to simplify it for the user to use these extensions on multiple Nostr or Bitcoin Lightning web clients or to ensure certain features are functional.
All these extensions need to ‘Access your data for all websites’ which I feel is a bit excessive. Also, although these extensions require an authorization for every event in the form of a prompt by the user , I still think adding an additional layer of permissison control by restricting them to only access data of user specified Nostr client domains would be more private and secure.
Google Chrome and possibly some Chromium forks allow the user to easily configure this in the extension properties, while Firefox has yet to this feature.
This guide will provide information on how to configure your Nostr signer extension’s data access permission to domains that you can configure for Chrome, Firefox and some browsers that allow installing these extensions.
Setting up in Google Chrome and Chromium forks for desktop OS
The setup on Chrome and Chromium forks is simple:
-
Launch the browser, install Alby or Nos2x and configure the extensions as per your preference. See the guide on key management for details.
-
Go to the extensions page or type
chrome://extensionsin the address bar: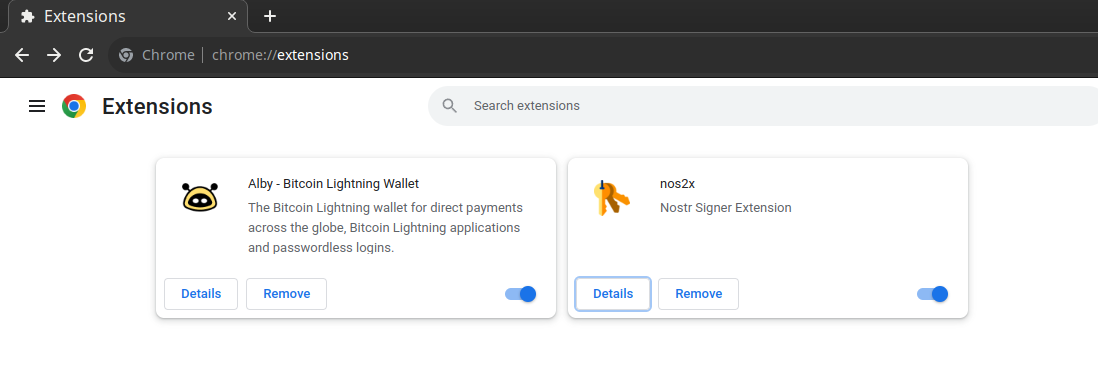
Chrome extensions page -
Click on
Detailsbutton on the extension and under ‘Allow this extension to read and change all your data on websites you visit:’ selectOn specific sites. This should display a prompt to add your preferred Nostr client domains to give it access to.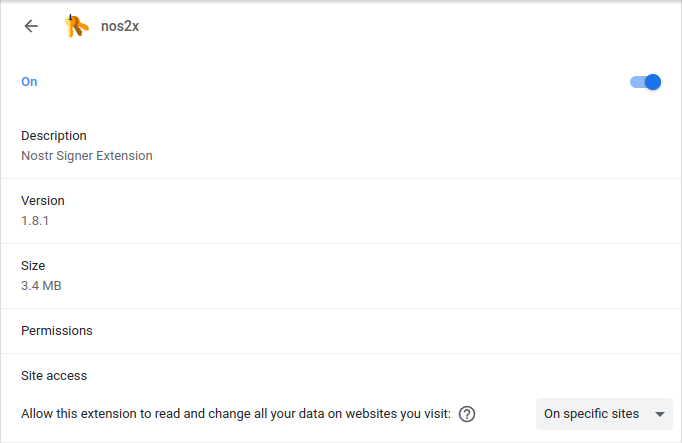
Extension permission configuration 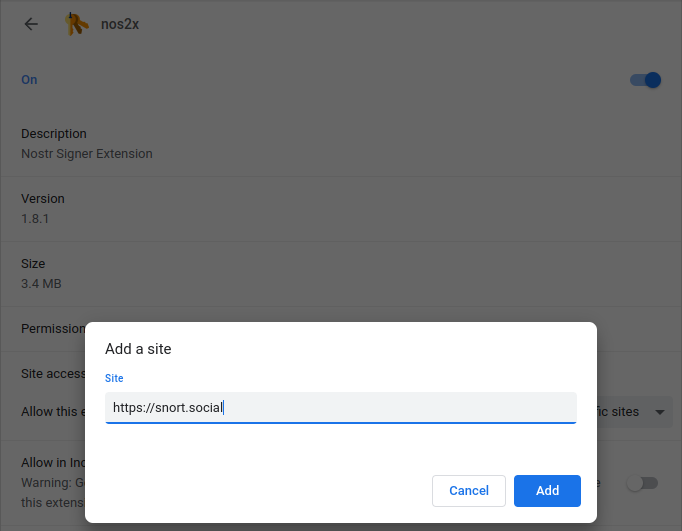
Extension permission configuration 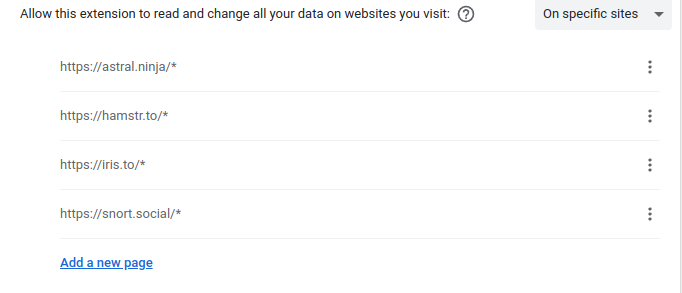
Extension permission configuration -
Visit any of the configured domains and the
Login with extensionoption should be enabled on Nostr web clients or the clients will automatically prompt for authorization to login using the extension. If you visit any other website where the extension is not configured to access data to, it will not have the permission to function there. In the below screenshots you can see that it is accessible via snort.social but not on coracle.social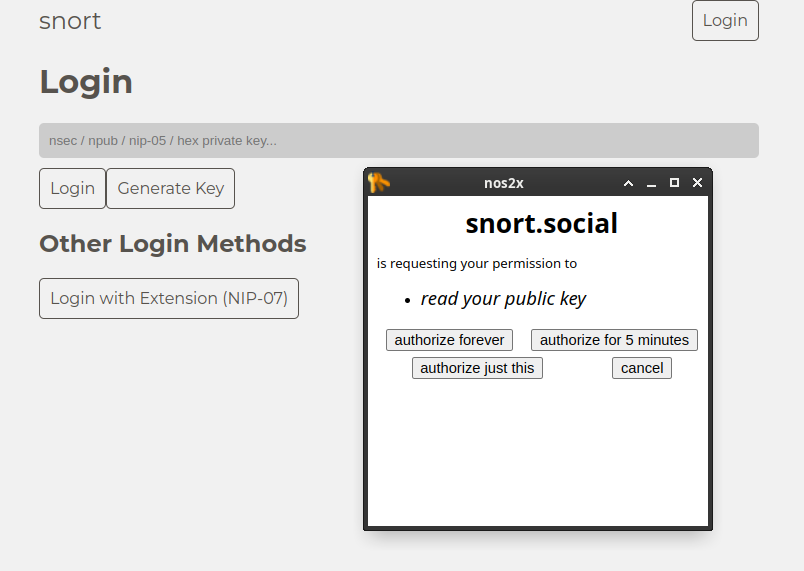
Extension permitted on snort.social 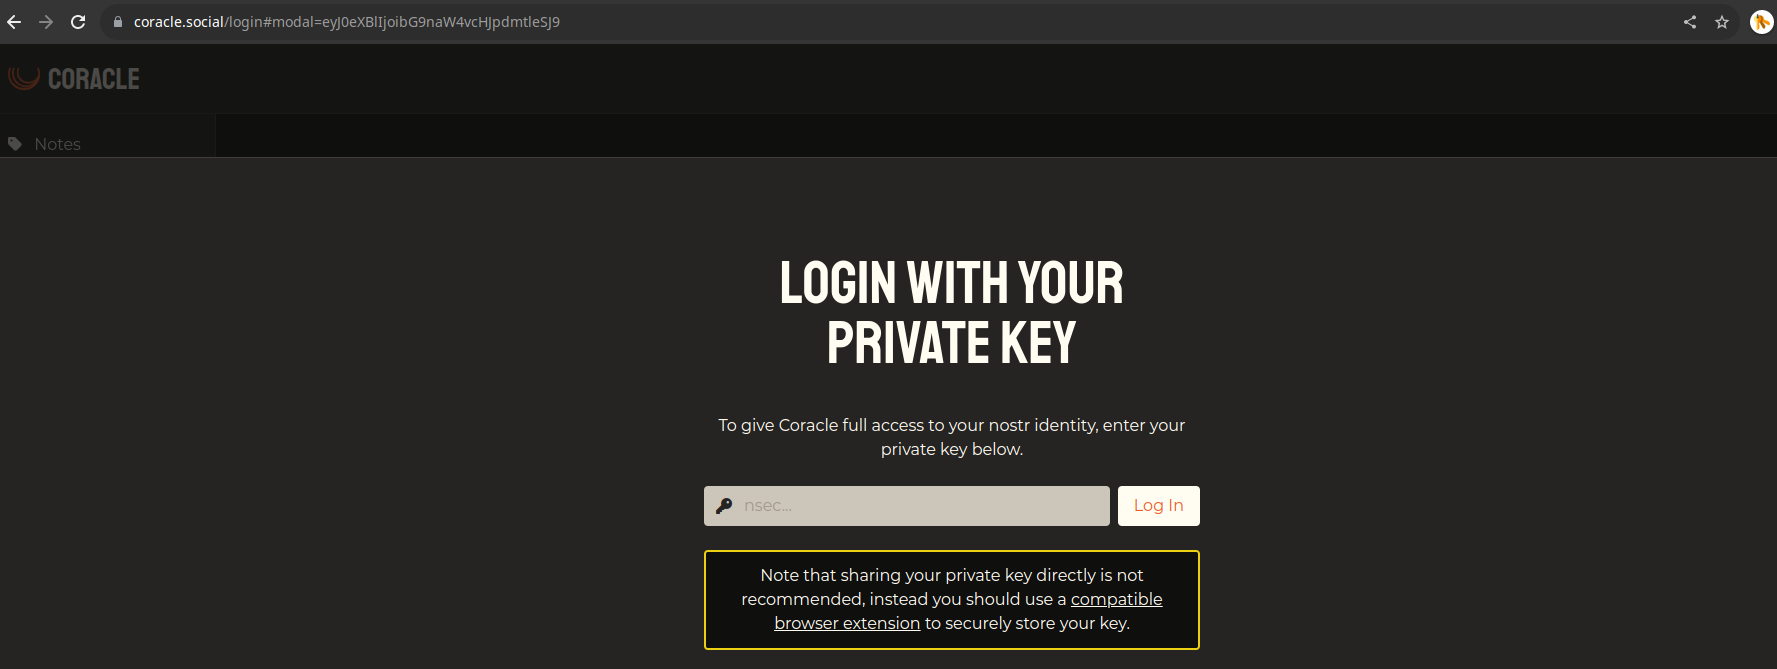
Extension on coracle.social not permitted
If you found this guide useful feel free to leave a Lightning tip at:
Setting up in Firefox for desktop OS:
Since Firefox does not provide an easy option to configure the permission in the browser and the extensions default to ‘Acess your data for all websites’, we will have to configure the extension’s manifest.json file, repackage the extension and install it either as an unsigned extension or a signed extension.
Nos2x-fox manifest.json configuration
-
Install git on your OS, clone Nos2x-fox as below and change directory to that cloned folder:
git clone https://github.com/diegogurpegui/nos2x-fox cd nos2x-fox/src -
Find
manifest.jsoninnos2x-fox/srcfolder and open it with a text editor. Find the"content_scripts":"matches"section and update it as below and save the changes:Replace this: "content_scripts": [ { "matches": [ "<all_urls>" ], "js": [ "content-script.js" ] } With this: "content_scripts": [ { "matches": [ "https://<nostrwebclient>.tld/*", "https://<nostrwebclient2>.tld/*" ], "js": [ "content-script.js" ] }Note: Change
https://<nostrwebclient>.tld/*with the Nostr client domains that you would like to permit the extension to access data to. For example:https://snort.social/*. Each entry should be on a different line and separated by a comma",".Also, find
browser_specific_settingsand update theidvalue to an email address of your own. A unique ID will be needed to sign your extension with Mozilla."browser_specific_settings": { "gecko": { "id": "<yourmail@emailhost.tld>", "update_url": "https://diegogurpegui.com/nos2x-fox/updates.json" } } -
Change directory back to the root folder
nos2x-foxand Installyarndependency manager to build nos2x-fox after the above modification is made. Run the below command to create the build:yarn run buildThis should create a new folder
distin your current directory. -
Install Web-ext command line tool provided by Mozilla by referring to their GitHub page, using npm or on Linux from your distro’s repository. We will use this tool to build an extension zip file from within the
distfolder, so change your directory tonos2x-fox/dist.After installing
web-ext, run the below command in the foldernos2x-fox/dist:web-ext buildThis should create an extension zip file in
nos2x-fox/dist/web-ext-artifacts/Note: At this point the
.zipfile extension that got built using web-ext is an unsigned extension. This means that you will not be able to install it in Firefox just yet. Firefox blocks installation of unsigned extensions to prevent malicious extensions from running. The expectation is that you will need to submit and upload the zip file Add-on to Mozilla for a review of the permissions and code, which is mostly automated, and you should then be able to distribute it manually or publish it on the Mozilla extension store. -
If you would like to run the extension unsigned on Firefox permanently, type
about:configand set the flag forxpinstall.signatures.requiredtofalse.Warning: Disabling this setting in your browser could expose you to the risk of having malicious Add-ons or extensions being installed. Proceed with caution.
- Open the extensions page or visit
about:addonsin the address bar and click onExtensions. Click the gear icon under manage your extensions and selectInstall Add-on from file. Browse to your built.zipfile and install it. At this point you can setup the extension using the guide for Nostr key management and try visiting the Nostr client domains that you had configured in the manifest.json file. They should allow you to login using the extension, while your extension should not be able to authorize events or access data for other websites. - You can verify the permissions under the manager your extension page of Firefox by clicking on the button with the three dots
"..."next to the installed add-on, click manage and click permissions. You should only see your configured domains listed for access to data and you should be all done.
- Open the extensions page or visit
-
If you would like to sign the extension with Mozilla and install it without disabling the signatures required configuration in your browser, follow the below steps:
- Visit Firefox Extnesion Workshop and click ‘Submit or manage extensions’ button on the top right corner of the webpage.
- Sign-up and login to Mozilla with your email or a throwaway email and visit here to submit your modified add-on.
- Select ‘On your own’ as the distribution method, upload your
.zipfile, checkFirefoxas the version compatible and continue. Mozilla will peform some automatic validations and checks to ensure that your extension can be signed. After it is successful, it will email you a confirmation in some time that your extension is signed succesfully and is available for download.
Open the approved add-on link in the email from Mozilla to download the
.xpifile. Right click on the file and save link as to download and distribute, or you can also click on it to install on your browser.- At this point you can setup the extension using the guide for Nostr key management and try visiting the Nostr client domains that you had configured in the manifest.json file. They should allow you to login using the extension, while your extension should not be able to authorize events or access data for other websites.
- You can verify the permissions under the manager your extension page of Firefox by clicking on the button with the three dots
"..."next to the installed add-on, click manage and click permissions. You should only see your configured domains listed for access to data and you should be all done.
Lightning Address: ezofox@orangepill.dev, OR
LNURL: